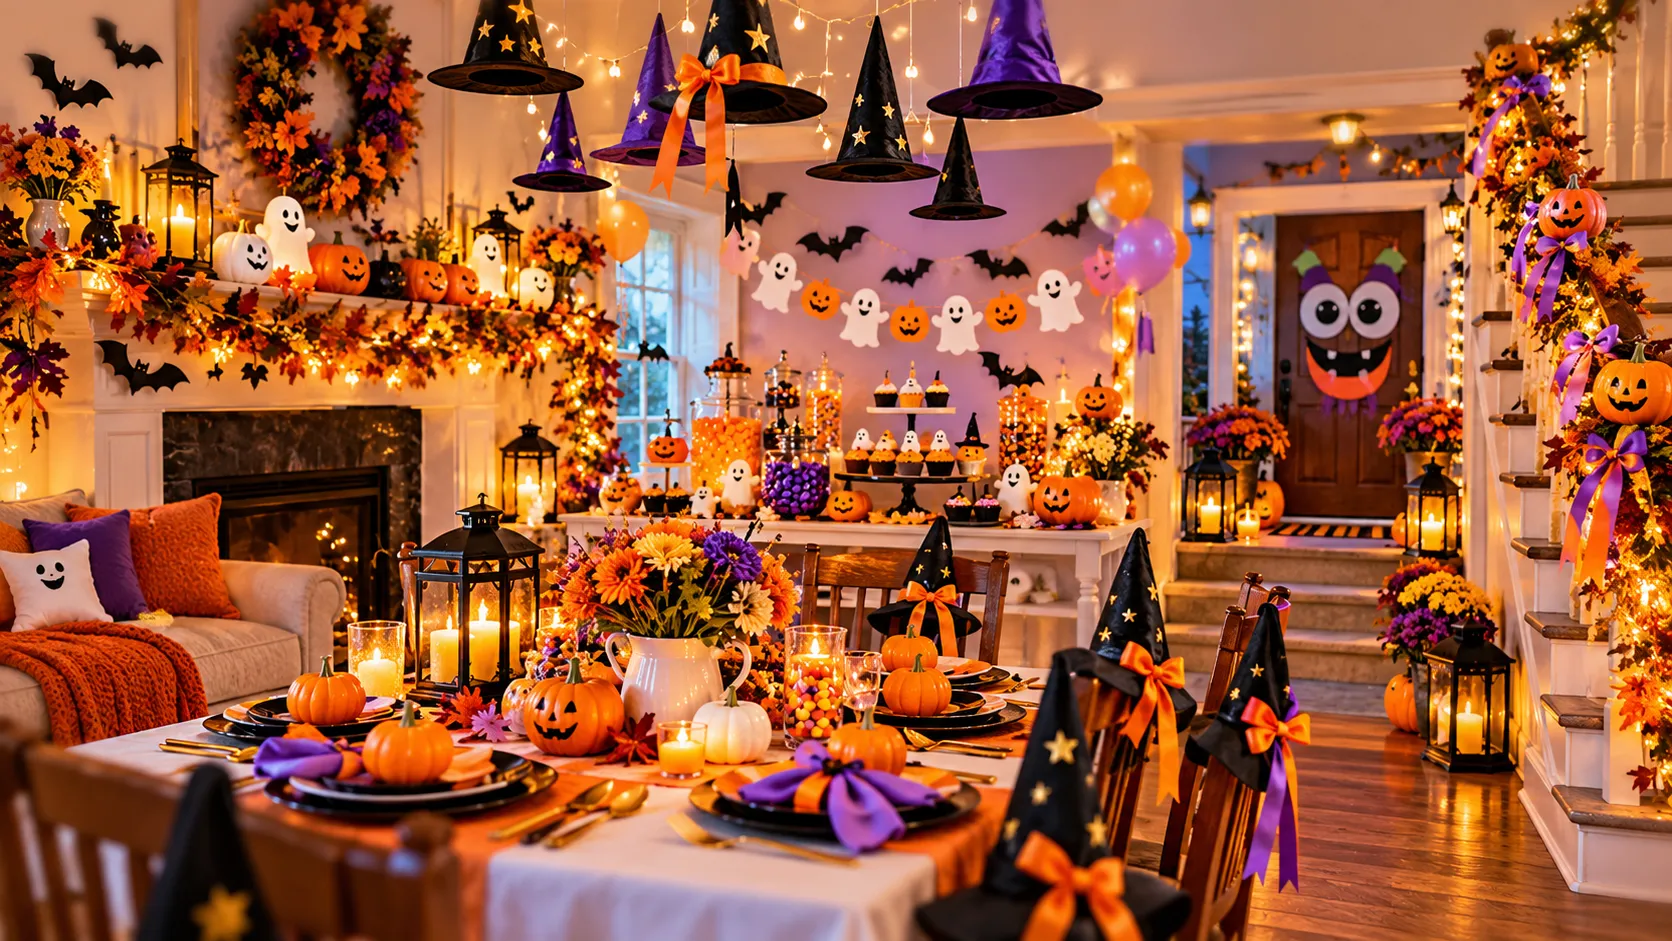
23 Stunning Halloween Party Decorations With Joyful Details
Want to throw a Halloween party that feels cheerful, colorful, and absolutely unforgettable? The right Halloween party decorations can turn an ordinary home into a festive celebration filled with smiling pumpkins, playful ghosts, and delightful seasonal details.
You don’t need an expensive decorating budget or professional crafting skills to create a party your guests will love. A few thoughtful touches, from glowing pumpkin pathways to colorful balloon arches, can make your celebration feel welcoming and exciting.
These 23 creative ideas cover everything from eye-catching table centerpieces and adorable wall garlands to festive entrance displays and charming photo corners.
I’ve noticed that coordinating just a few colors and repeating small decorative details can make party spaces feel much more organized and inviting.
Whether you’re planning a family gathering, a children’s Halloween party, or a cozy celebration with friends, you’ll find practical inspiration to create a joyful atmosphere worth photographing and sharing!
1. Smiling Pumpkin Centerpieces
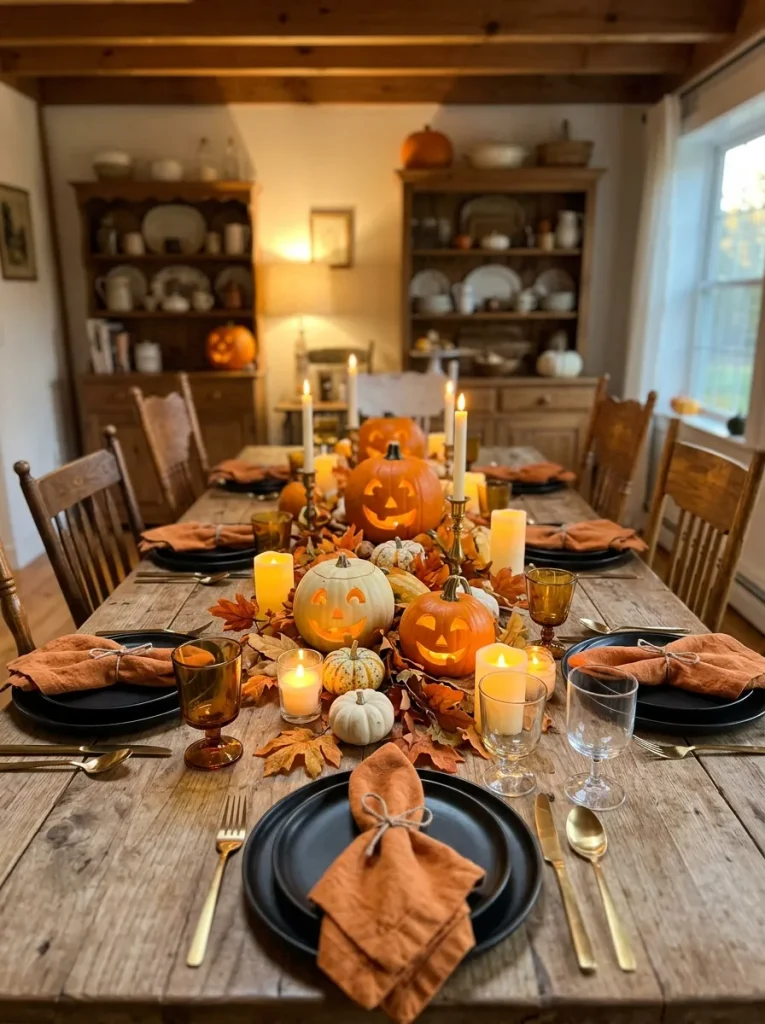
Nothing brings instant Halloween happiness to a party table like cheerful pumpkin centerpieces. Arrange three pumpkins in different sizes along a wooden dining table, mixing traditional orange with soft cream varieties. Add smiling faces using removable vinyl stickers or washable markers for a friendly, family-focused look that feels festive rather than frightening.
Surround the pumpkins with autumn leaves, miniature gourds, and battery-operated candles for a warm seasonal glow. Keep taller decorations away from guests’ sightlines so conversations remain comfortable. This arrangement works beautifully for buffet tables, family dinners, and Halloween celebrations where colorful details create a welcoming atmosphere for everyone.
2. Colorful Halloween Balloon Arch
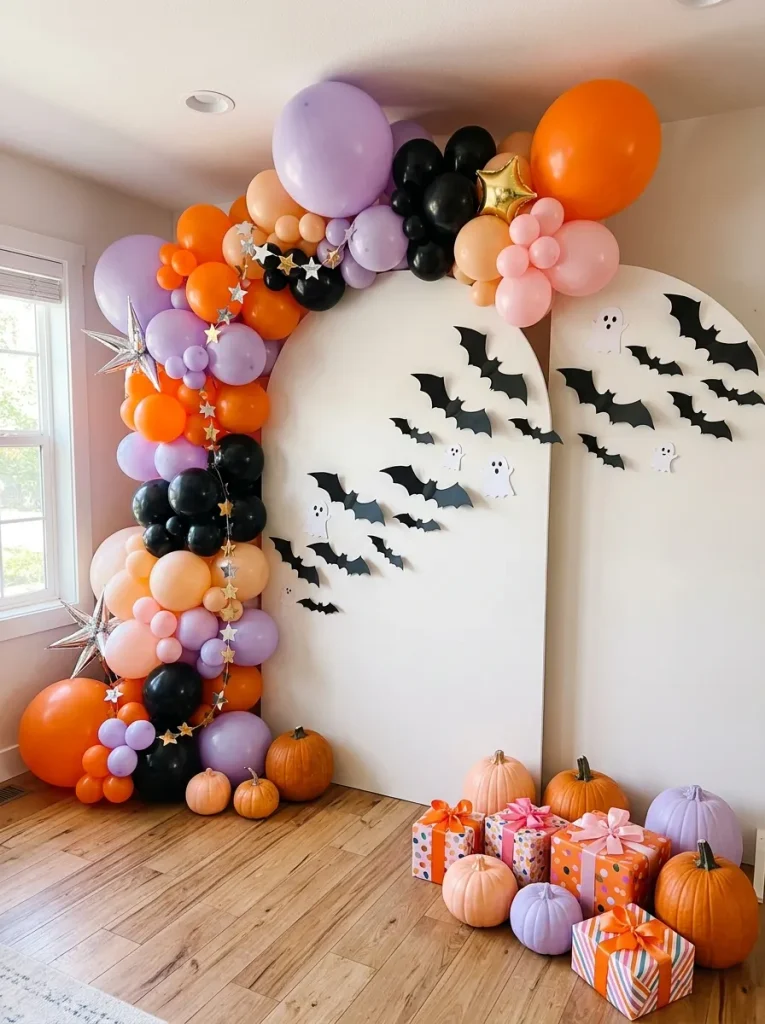
A colorful balloon arch instantly turns an ordinary wall into a cheerful Halloween photo backdrop. Combining traditional spooky colors with unexpected pastels creates a fresh, playful party atmosphere.
- Choose a balanced palette: Combine orange, lavender, black, and peach balloons for a lively Halloween color scheme.
- Mix balloon sizes: Use small, medium, and large balloons to create a fuller, more dimensional arrangement.
- Build a sturdy base: Attach inflated balloons to a decorating strip and secure it with removable wall hooks rated for the weight.
- Add playful accents: Tuck lightweight paper bats, smiling ghosts, and metallic stars between balloon clusters.
- Create a photo corner: Position the finished arch against a clear wall with enough room for guests to pose comfortably.
Among Halloween party decorations, balloon arches are especially useful because they decorate large spaces while creating a dedicated photography area. Inflate balloons shortly before the celebration for a fresher appearance. Keep loose balloons and broken pieces away from young children, and select a backdrop that complements your party colors.
3. Floating Friendly Ghosts
Quick Tip:
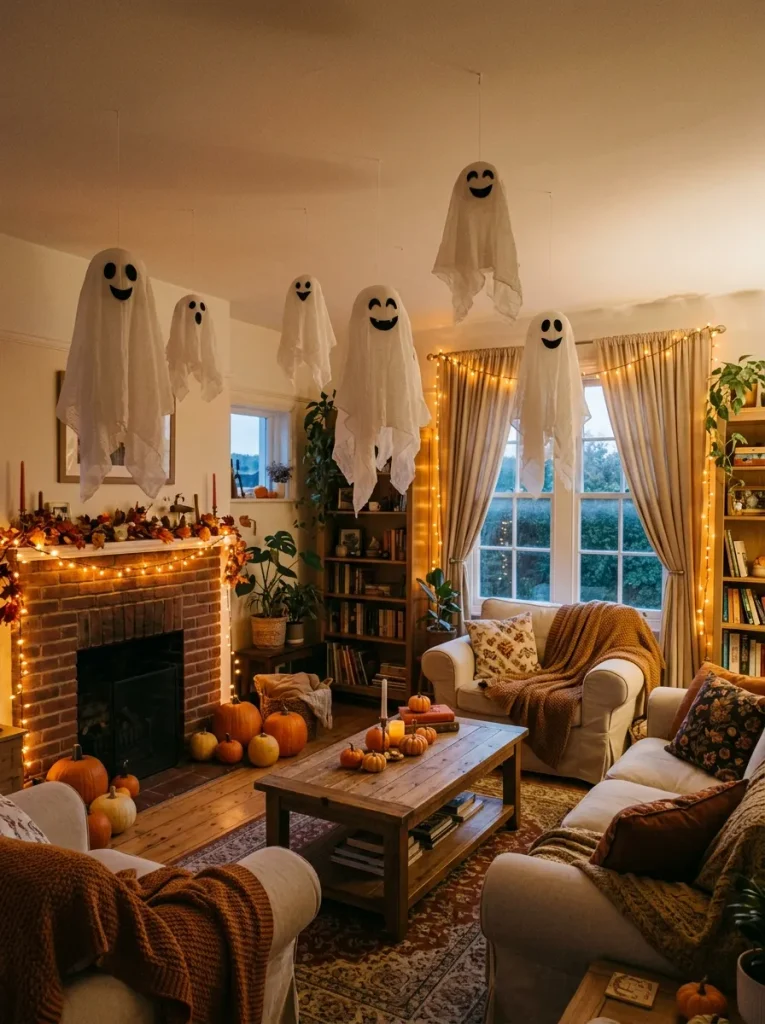
Create adorable floating ghosts by draping lightweight white cotton fabric over small foam balls and securing the fabric beneath each ball with white thread. Attach black felt eyes and smiling mouths using fabric glue. Hang them from securely mounted ceiling hooks, keeping them away from ceiling fans, lights, and open flames.
Floating ghosts add playful movement and visual interest to Halloween celebrations without making the room feel frightening. Arrange them at staggered heights above a dessert table or along an unused wall. Pair white fabric with warm fairy lights and orange pumpkins for a cozy atmosphere that photographs beautifully.
Find More: 21 Dreamy Halloween Party Decor For A Fabulous Celebration
4. Candy Corn Table Setting
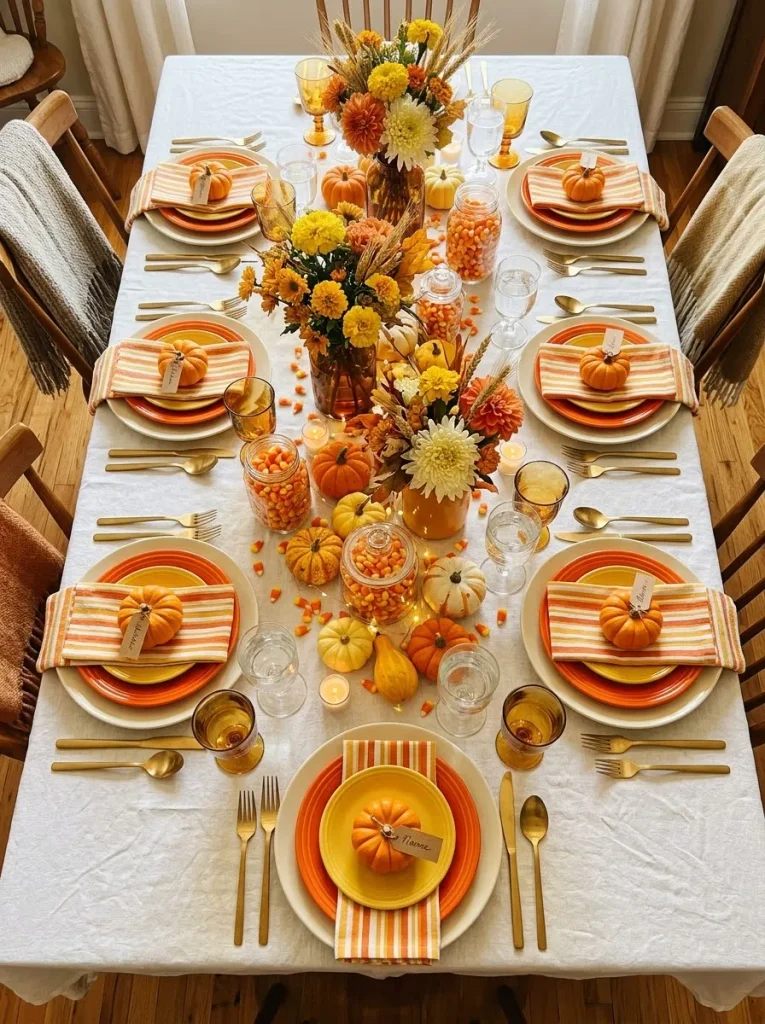
BEFORE:
A plain dining table with ordinary plates and napkins can feel disconnected from the Halloween celebration. Without coordinated colors or festive accessories, even a delicious party menu may lack the cheerful presentation guests expect.
AFTER:
Orange, yellow, and white tableware creates a recognizable candy corn theme filled with playful seasonal charm. Miniature pumpkin place cards, striped napkins, and colorful candy jars make each place setting feel thoughtful and welcoming.
Start with affordable white plates and add colorful paper napkins instead of purchasing entirely new dinnerware. Fill clear glass jars with candy corn and arrange them between small pumpkins. Keep centerpieces low enough for conversation. This cheerful arrangement works particularly well for family Halloween dinners and children’s parties.
5. Glowing Pumpkin Lantern Pathway
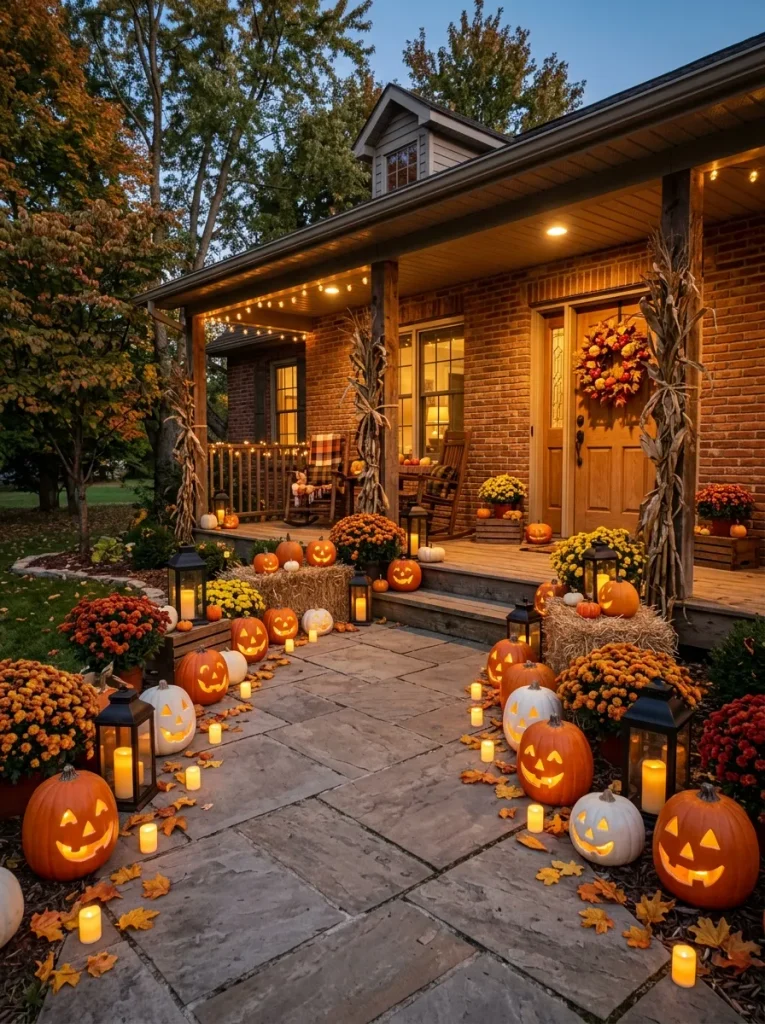
A glowing pumpkin pathway makes guests feel welcome before they even reach your front door. Create this cheerful outdoor Halloween display with a few simple steps.
1. Plan the pathway: Choose a clear route from the sidewalk to your entrance, leaving plenty of walking space for guests.
2. Gather pumpkins: Select orange and white pumpkins in different sizes to create an interesting arrangement.
3. Add friendly faces: Carve smiling expressions or decorate pumpkins with weather-resistant removable stickers.
4. Install safe lighting: Place battery-operated LED candles inside carved pumpkins and use outdoor-rated lights where needed.
5. Finish with autumn accents: Arrange potted chrysanthemums, small hay bales, and decorative lanterns beside the pathway without blocking access.
This welcoming outdoor display combines traditional Halloween charm with practical lighting. Group pumpkins in clusters of three near the entrance for visual balance. Secure lightweight decorations against wind and keep electrical cords away from walking areas. Guests will notice the cheerful glow as soon as they arrive.
6. Playful Halloween Dessert Table
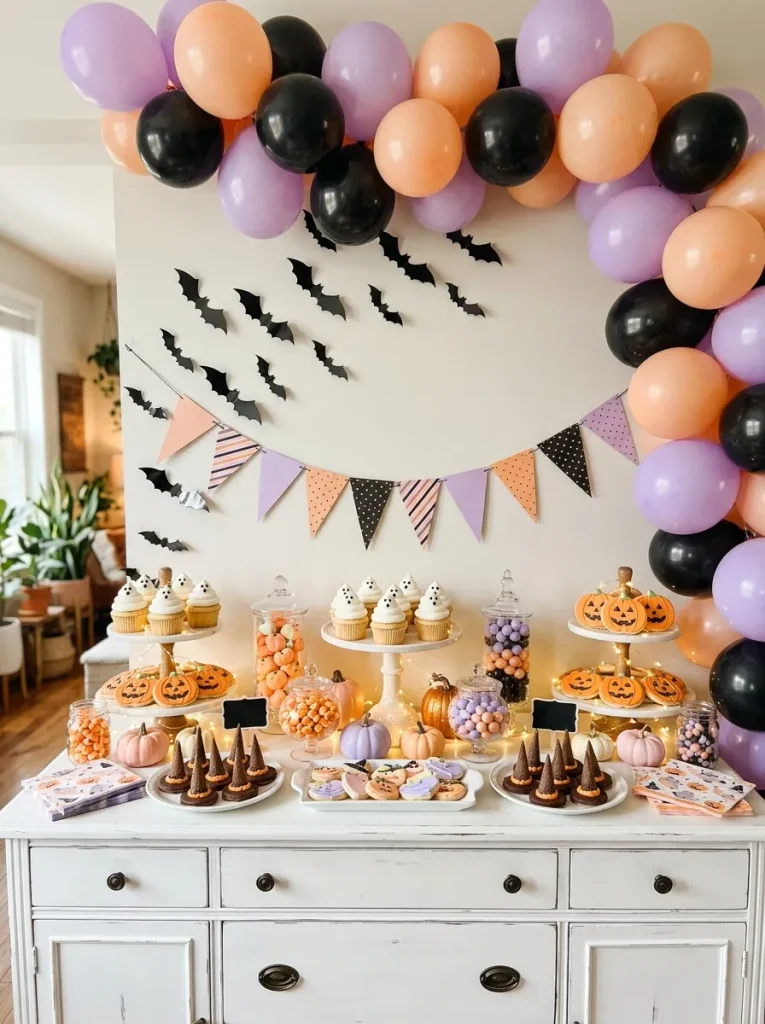
| Decoration Detail | Simple Dessert Setup | Joyful Halloween Setup |
| Table covering | Plain white tablecloth | Orange runner over white linen |
| Dessert display | Matching flat serving plates | Tiered stands and colorful trays |
| Background | Empty wall | Paper bats and smiling ghost garland |
| Candy containers | Original packaging | Clear jars with festive labels |
| Lighting | Standard room lighting | Warm battery-operated fairy lights |
A themed dessert table becomes a cheerful focal point when treats are arranged at different heights. The taller cake stands toward the back and smaller bowls near the front for easy serving. Coordinate orange, black, and lavender accents without overcrowding the surface. Leave space for napkins and serving utensils.
7. Whimsical Witch Hat Chandelier
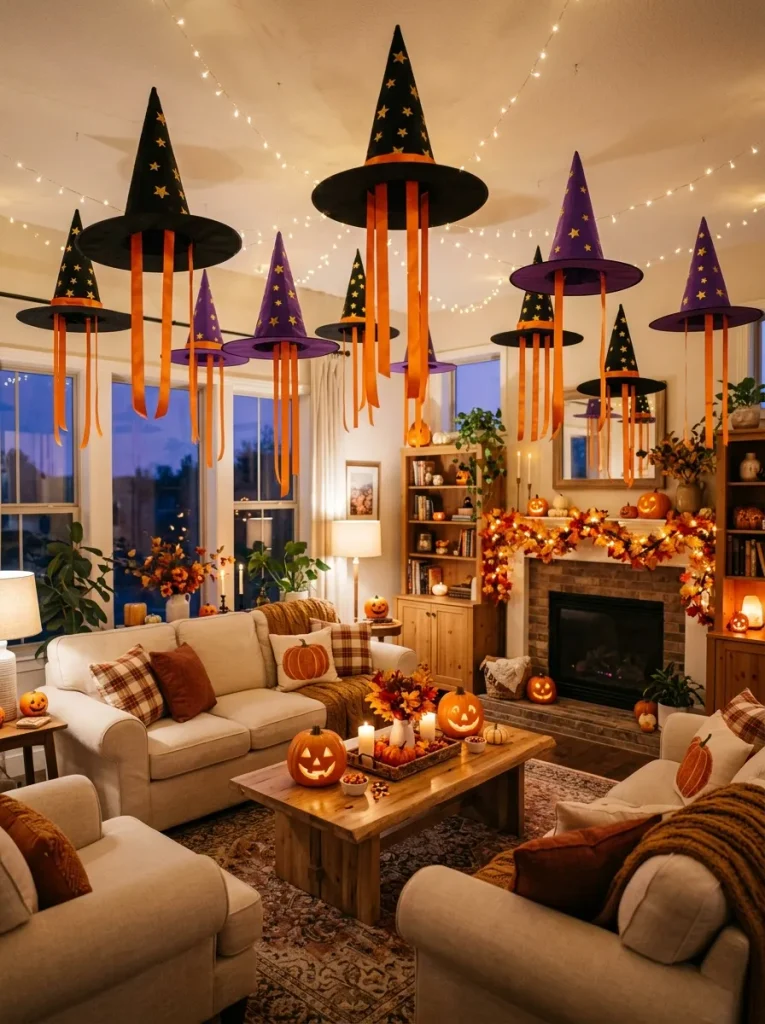
Floating witch hats bring a playful magical touch to Halloween celebrations while turning unused ceiling space into an eye-catching decoration. Arrange lightweight hats at different heights above a party table or open corner for a charming suspended display.
DO:
- Choose lightweight felt witch hats in black, purple, and orange.
- Attach golden stars and colorful ribbons for cheerful accents.
- Use securely installed ceiling hooks and strong transparent fishing line.
- Hang hats at varied heights to create visual depth.
DON’T:
- Position decorations near ceiling fans or hot light fixtures.
- Hang witch hats where guests might bump their heads.
- Overcrowd the ceiling with too many decorations.
- Rely on ordinary adhesive tape for heavy hanging arrangements.
This magical ceiling display works particularly well above a dessert station or designated photo area. Add battery-powered fairy lights nearby to enhance the festive atmosphere without creating heat hazards. For smaller rooms, arrange five to seven hats in one corner, keeping the remaining ceiling visually uncluttered.
8. Smiling Ghost Wall Garland
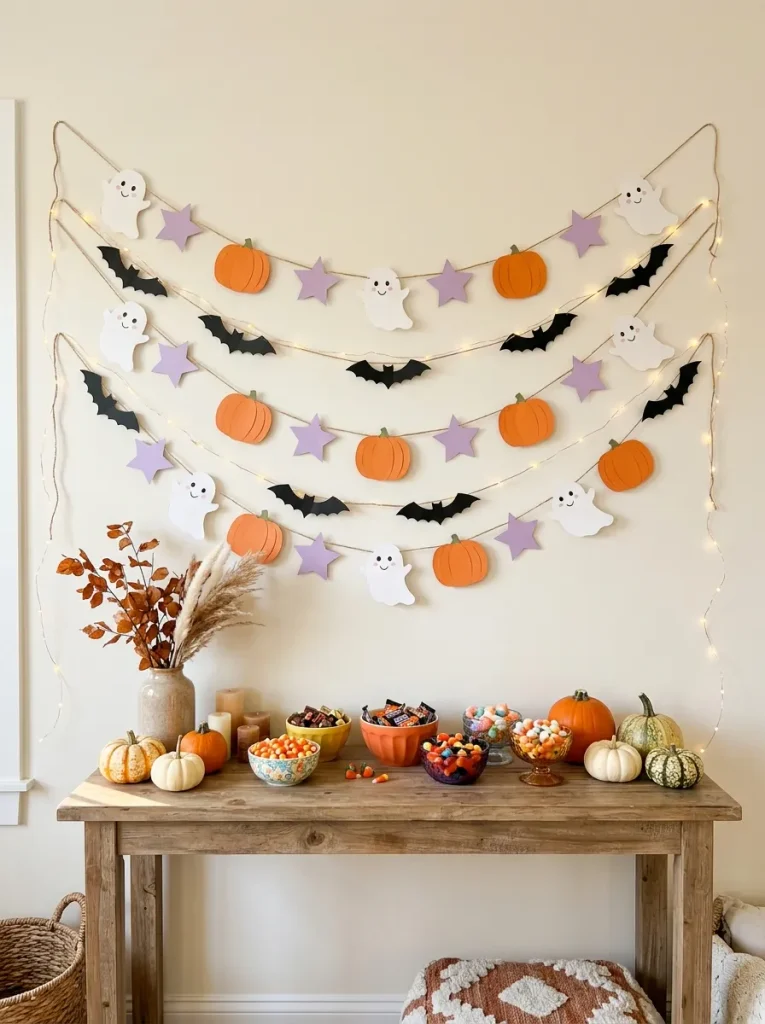
A smiling ghost garland turns an empty wall into a cheerful Halloween backdrop without requiring expensive decorating supplies.
Cost: Approximately $5 to $15 for cardstock, string, and adhesive materials.
Time: Around 30 to 45 minutes for cutting, decorating, and hanging.
Skill Level: Beginner-friendly, suitable for a simple family crafting activity.
Best For: Dessert tables, entryways, children’s celebrations, and small apartment parties.
Cut ghost shapes from white cardstock and draw different smiling expressions with a black marker. Alternate them with orange paper pumpkins and lavender stars for a colorful arrangement. Attach everything to a cotton string using small clips. Hang the garland with removable hooks to protect painted walls.
9. Pumpkin Patch Photo Corner
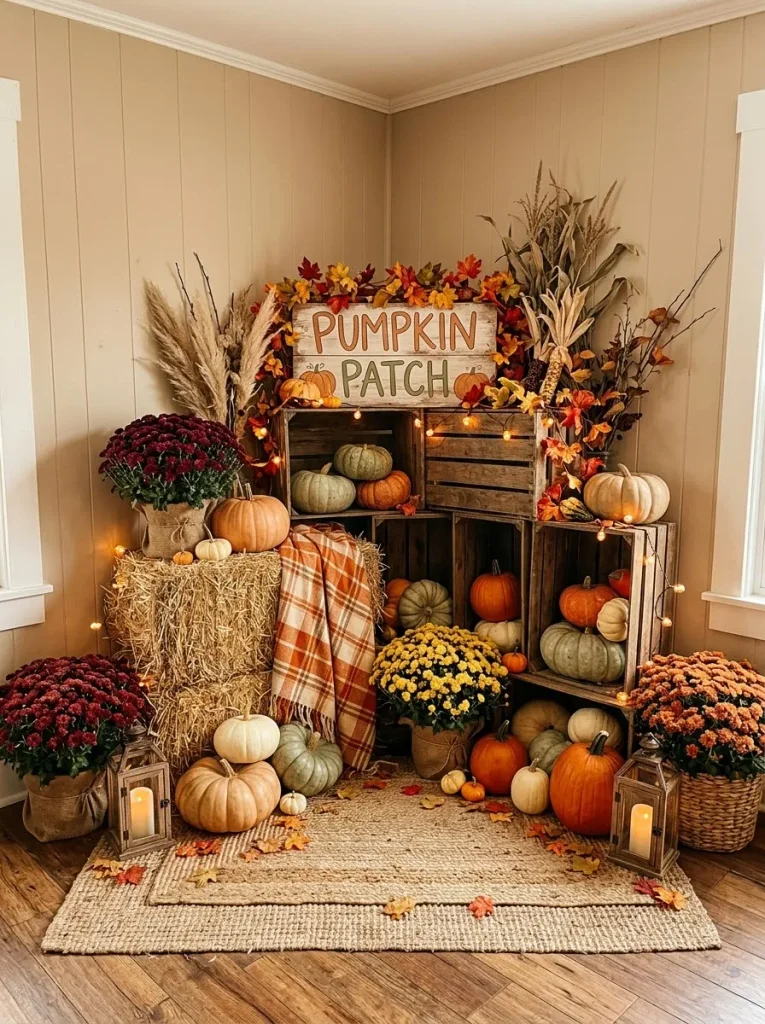
A miniature pumpkin patch creates a welcoming photography corner that guests will naturally want to use throughout the celebration. Stack sturdy wooden crates at different heights and arrange pumpkins around their bases. Mix orange, cream, and muted green shades for a balanced autumn palette that complements traditional Halloween party decorations.
Place a small wooden bench or sturdy chair in front of the arrangement so guests can pose comfortably. Add potted chrysanthemums and warm string lights for extra seasonal charm. Keep the floor clear of loose decorations, especially around seating areas. This setup also works beautifully as a family photo backdrop before guests arrive.
10. Spooky Candy Buffet Station
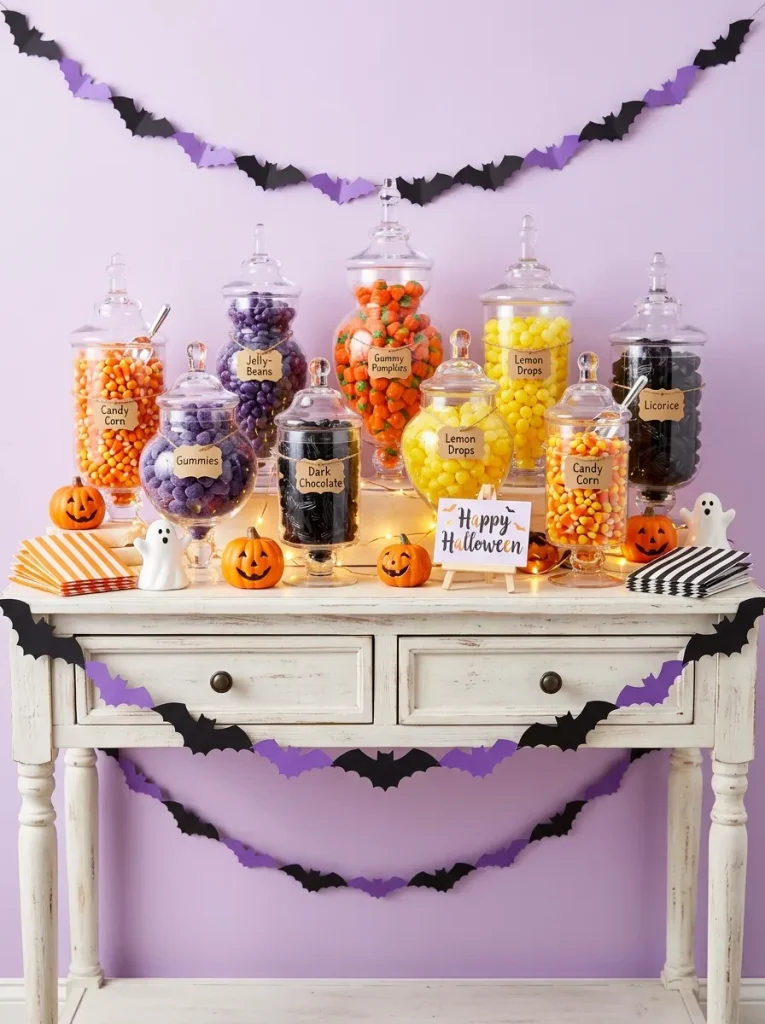
A colorful candy buffet instantly adds excitement to Halloween celebrations while giving guests a sweet treat to enjoy throughout the party. Create a cheerful display with these simple decorating details.
- Clear candy jars: Arrange transparent containers in different heights and fill them with colorful wrapped sweets, chocolates, and gummy candies.
- Festive color palette: Combine orange, purple, yellow, and black candies to create a coordinated Halloween theme.
- Decorative labels: Attach playful pumpkin or ghost labels to jars, clearly identifying each candy variety.
- Take-home treat bags: Provide small orange and white paper bags so guests can collect their favorite sweets.
- Cheerful table accents: Add miniature pumpkins, smiling ghost figurines, and battery-operated fairy lights around the containers.
A candy station works beautifully near the party entrance or dessert table, where guests can easily access treats. Keep serving scoops beside each jar and label common allergens clearly. Choose containers with stable bases, especially when children are attending. The colorful arrangement doubles as an inviting Halloween decoration.
11. Cheerful Bat Wall Display
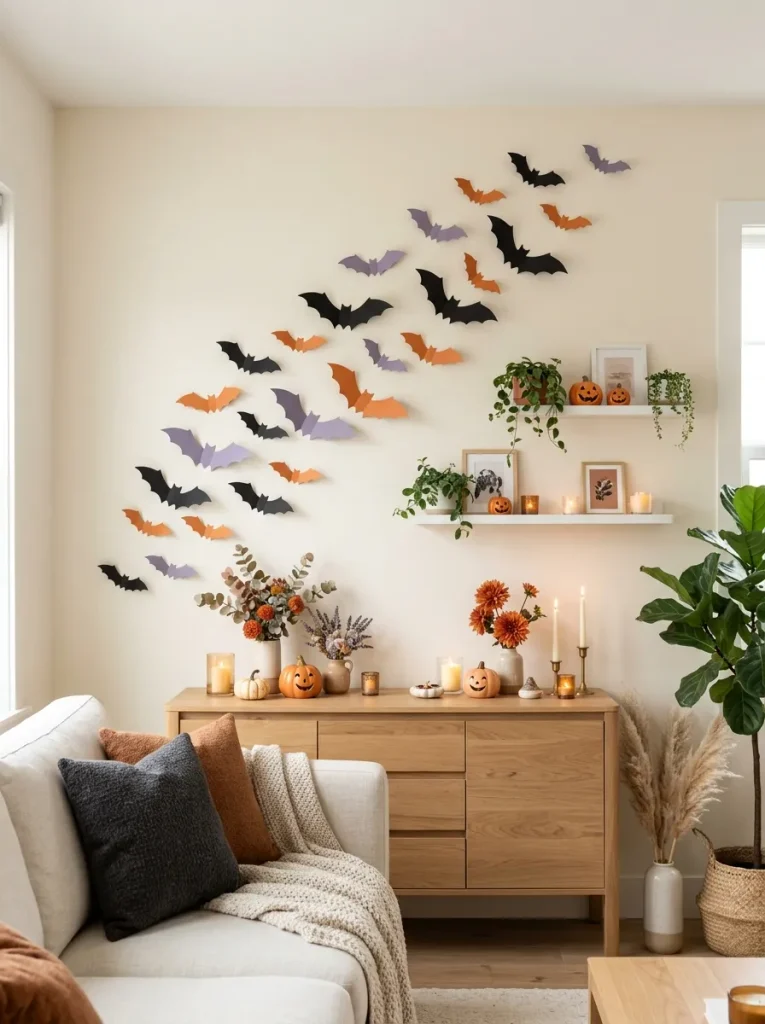
Quick Tip:
Create a more eye-catching bat display by cutting paper bats in three different sizes and arranging them diagonally across the wall. Gently fold each bat’s wings upward to create a three-dimensional effect. Use removable adhesive suitable for your wall finish and test it in a hidden area first.
A colorful bat arrangement gives ordinary walls a playful Halloween makeover without requiring complicated supplies. Start with larger bats near the lower corner and gradually introduce smaller shapes toward the top. Mix black with soft lavender for a cheerful contrast. Leave some empty wall space so the design feels balanced.
12. Festive Halloween Fireplace Mantel
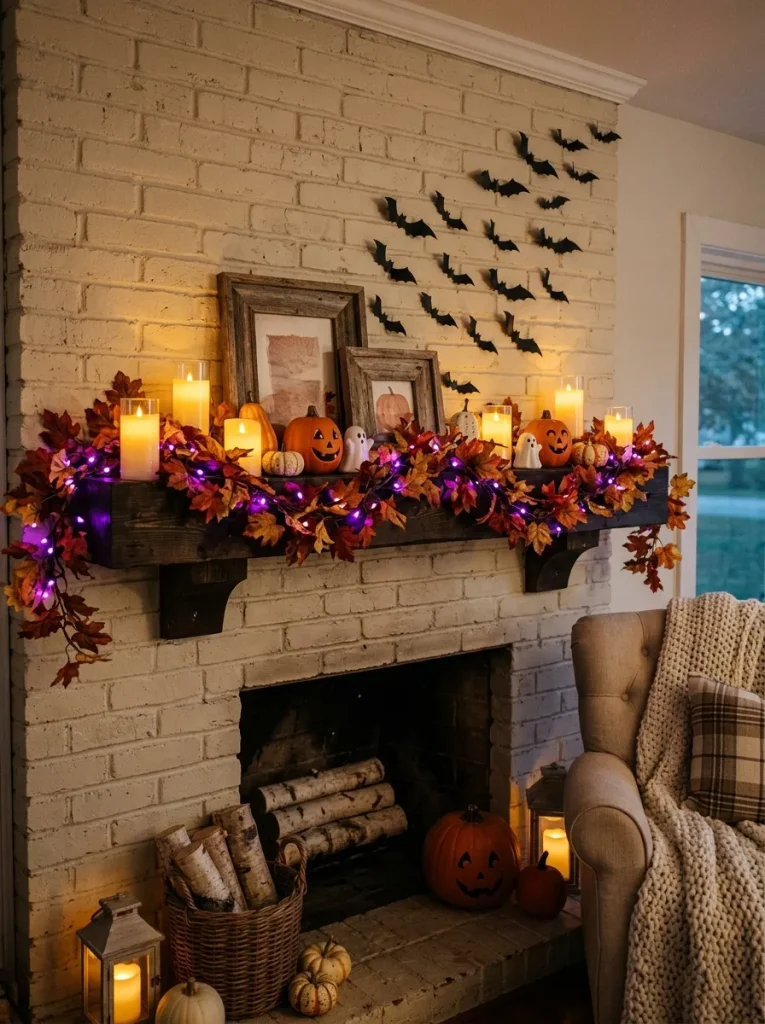
BEFORE:
An undecorated fireplace mantel can make the living room feel disconnected from the Halloween celebration. Everyday picture frames and neutral accessories may lack the playful seasonal colors that bring a party setting together.
AFTER:
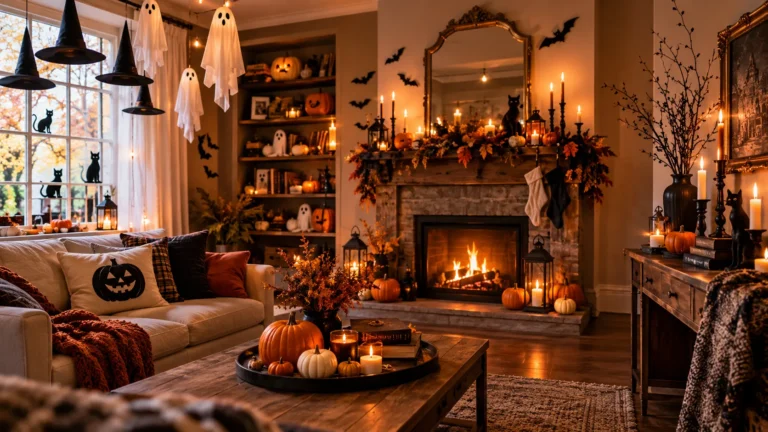
A cheerful arrangement of miniature pumpkins, smiling ghosts, and colorful autumn garlands introduces festive personality. Layered decorations create visual depth, while warm LED candles add a cozy glow that complements the surrounding furniture.
Start with a leafy garland along the mantel, then position pumpkins and ghost figurines in small groups. Vary their heights using sturdy decorative risers. Keep paper decorations, fabric, and battery lights away from heat sources. If the fireplace will be used, follow its required clearances and remove decorations from unsafe areas.
13. Pumpkin Balloon Centerpieces
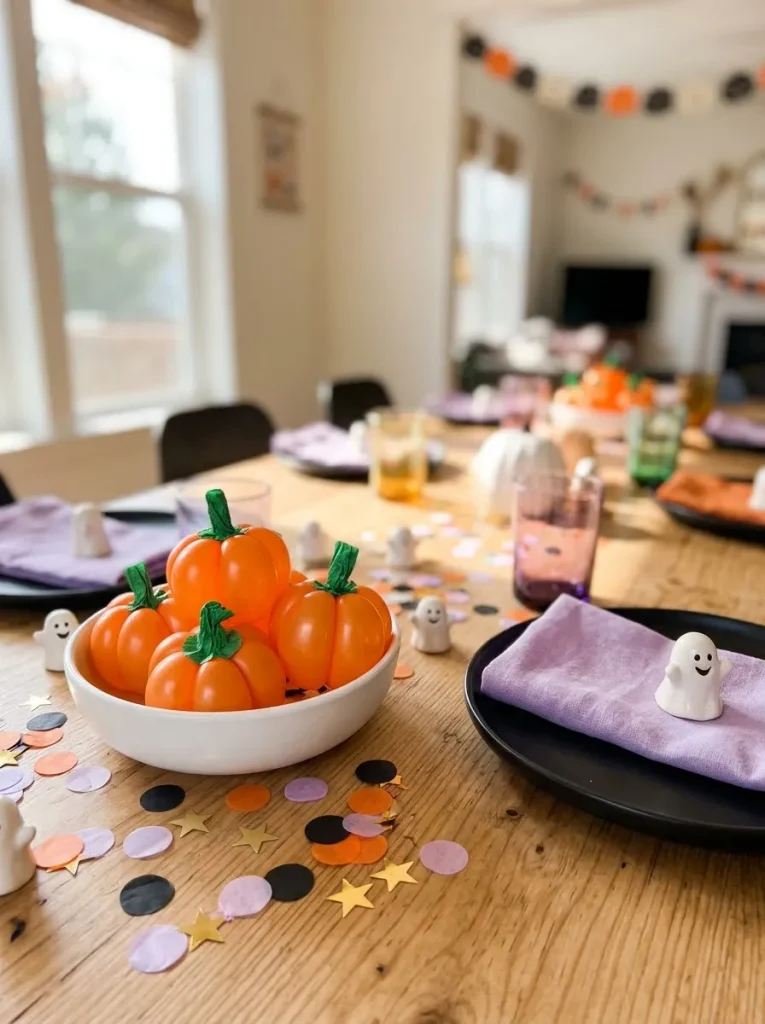
Bright orange balloon pumpkins make ordinary party tables feel playful, festive, and full of personality. These lightweight centerpieces are affordable to create and easy to coordinate with colorful Halloween tableware.
1. Inflate orange balloons: Choose small orange balloons and inflate them to approximately six inches for a balanced centerpiece arrangement.
2. Create pumpkin stems: Cut short stems and leaves from green cardstock, then attach them near the balloon knots using small pieces of tape.
3. Add cheerful faces: Draw smiling pumpkin expressions on paper cutouts and attach them to the balloons with removable adhesive.
4. Arrange the centerpieces: Place three to five balloon pumpkins inside shallow decorative bowls to keep them from rolling.
5. Finish with table accents: Surround the bowls with paper confetti, miniature ghost decorations, and colorful napkins.
These playful centerpieces offer a cheerful alternative to traditional carved pumpkins, especially for indoor Halloween celebrations. Choose low arrangements so guests can easily see one another across the table. Keep uninflated balloons and broken pieces away from young children, and prepare replacements in case any balloons deflate.
14. Friendly Monster Door Decor
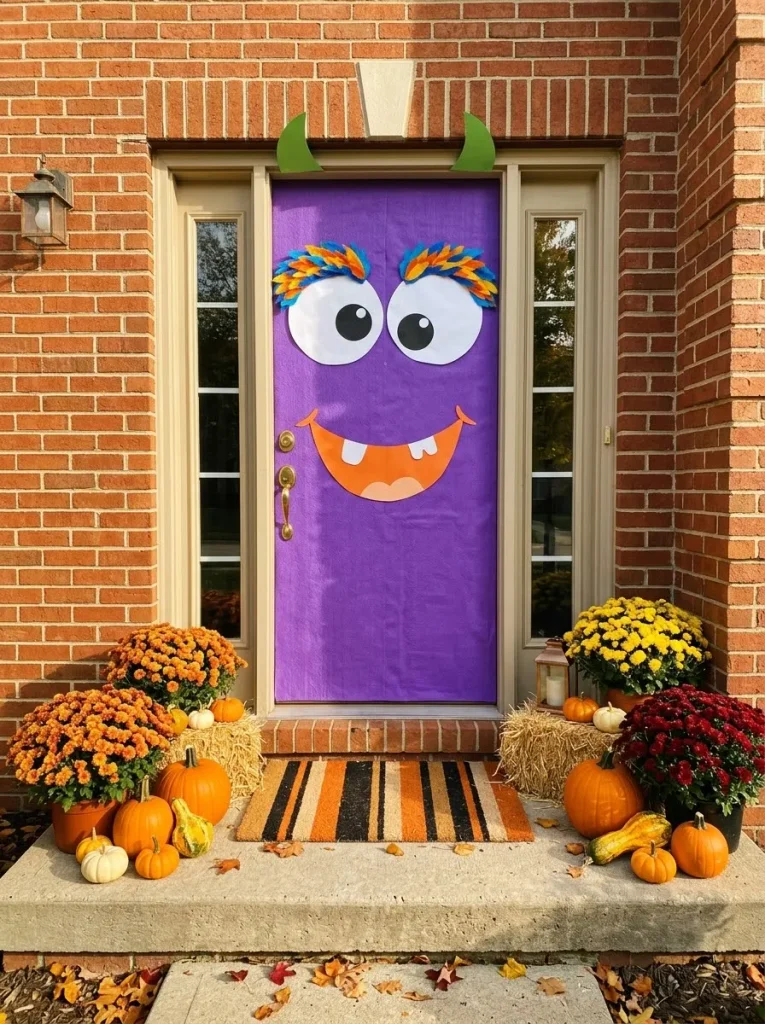
| Decoration Detail | Simple Monster Door | Colorful Monster Door |
| Base color | Plain purple paper | Layered purple and lavender paper |
| Eyes | Two white paper circles | Oversized eyes with colorful pupils |
| Mouth | Basic paper smile | Wide orange smile with rounded teeth |
| Horns | Small paper triangles | Curved green cardstock horns |
| Door accents | Minimal decorations | Matching pumpkins and festive doormat |
A friendly monster door creates an exciting first impression without relying on frightening Halloween imagery. Measure your door before cutting decorations, and position facial features around handles and windows. Use removable, weather-resistant adhesive suitable for the surface. Keep locks, hinges, and door movement completely unobstructed for safe entry.
15. Colorful Spiderweb Party Backdrop
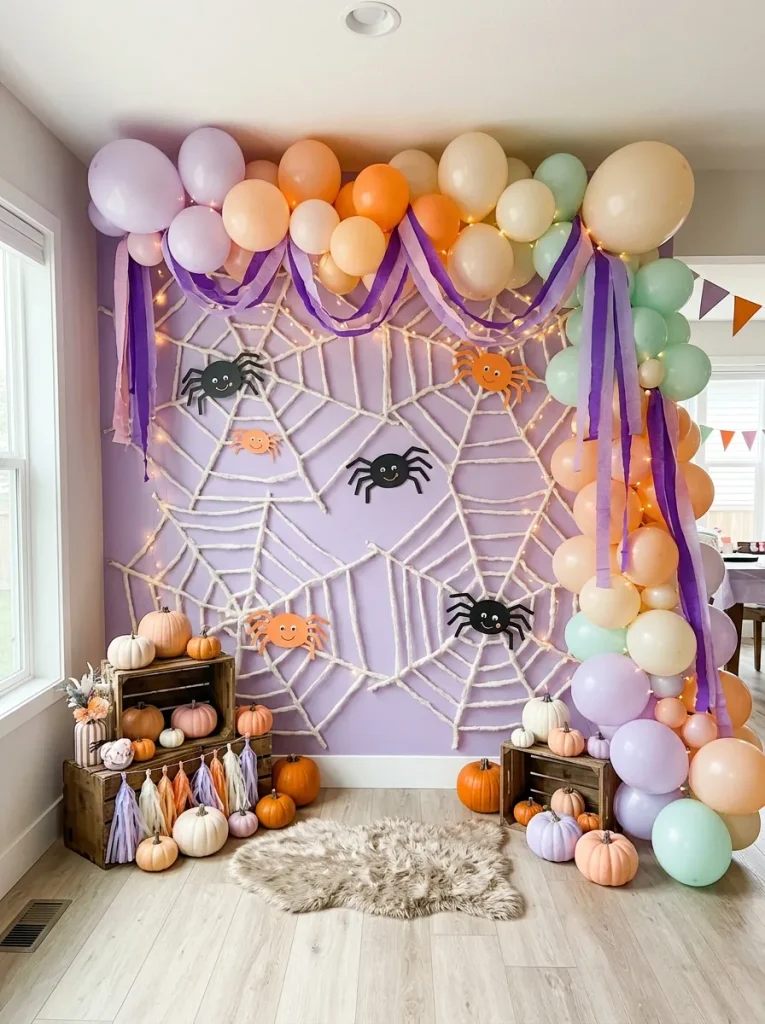
DO:
- Choose a lavender or cream backdrop to make colorful spider decorations stand out.
- Create oversized spiderweb patterns using white yarn and removable wall hooks.
- Add smiling paper spiders in orange, black, and purple.
- Arrange balloon clusters around the edges for a festive photo frame.
DON’T:
- Stretch yarn across doorways or frequently used walking paths.
- Attach decorations directly to delicate wallpaper without testing adhesive.
- Cover the entire backdrop with spiders and competing accessories.
- Position electrical lights beneath hanging paper decorations.
A colorful spiderweb backdrop brings playful Halloween energy to a party without creating an overly frightening atmosphere. Keep the web design concentrated in the center and frame it with balloons on either side. Position decorations securely above children’s reach, leaving enough open space for comfortable group photographs.
16. Glowing Ghost Mason Jars
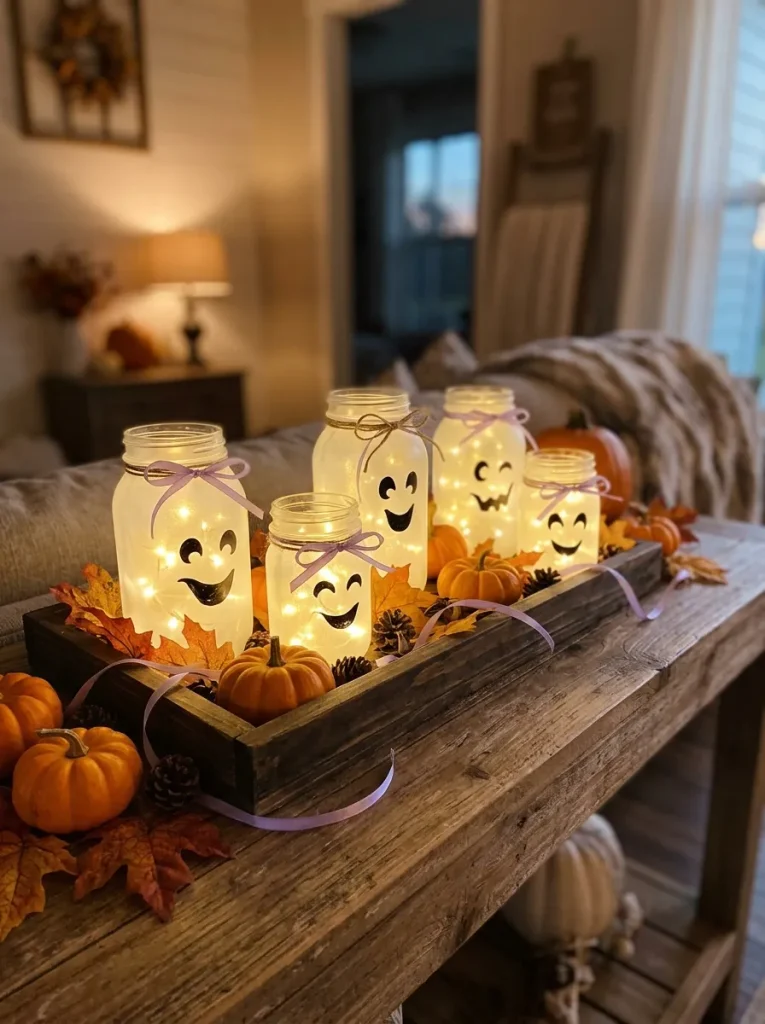
Cost: Approximately $10 to $25 for four jars, depending on materials already available.
Time: Around 30 to 45 minutes for decorating and arranging.
Skill Level: Beginner-friendly, with simple painting and assembly.
Best For: Entryway tables, dessert stations, fireplace mantels, and Halloween party centerpieces.
Glowing ghost jars bring a cozy, playful atmosphere to evening celebrations without complicated crafting techniques. Coat clean mason jars with frosted glass paint, then attach smiling faces using black adhesive vinyl. Place battery-operated fairy lights inside each jar. Group them in odd numbers for a balanced, eye-catching display.
17. Pastel Halloween Party Bunting
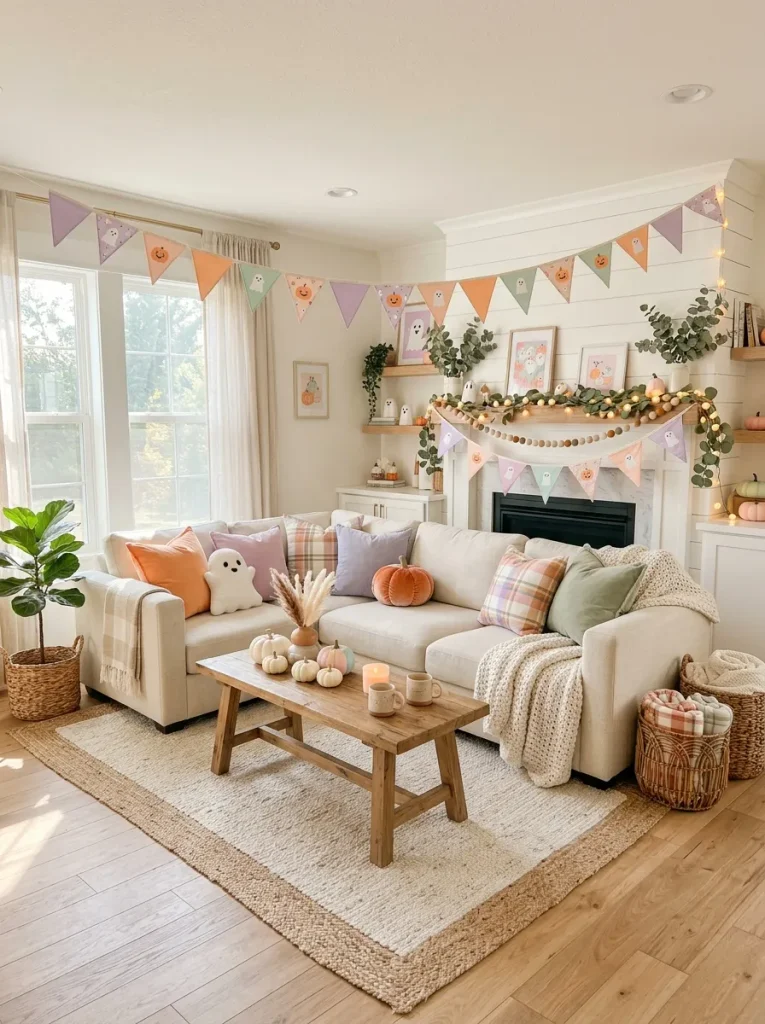
Soft pastel bunting brings a refreshing twist to traditional Halloween decorations, especially for parties that favor cheerful colors over frightening details. Cut triangular flags from lavender, peach, mint, and orange cardstock. Decorate alternating flags with smiling ghosts, tiny pumpkins, and simple stars before attaching them to cotton string.
Hang the bunting above a dessert table, across a feature wall, or along a staircase railing without blocking handrails. I’ve noticed that limiting decorative displays to four coordinated colors helps busy party spaces feel more organized. Pair the garland with matching napkins and balloons for a polished, photograph-friendly celebration.
18. Mini Pumpkin Party Favors
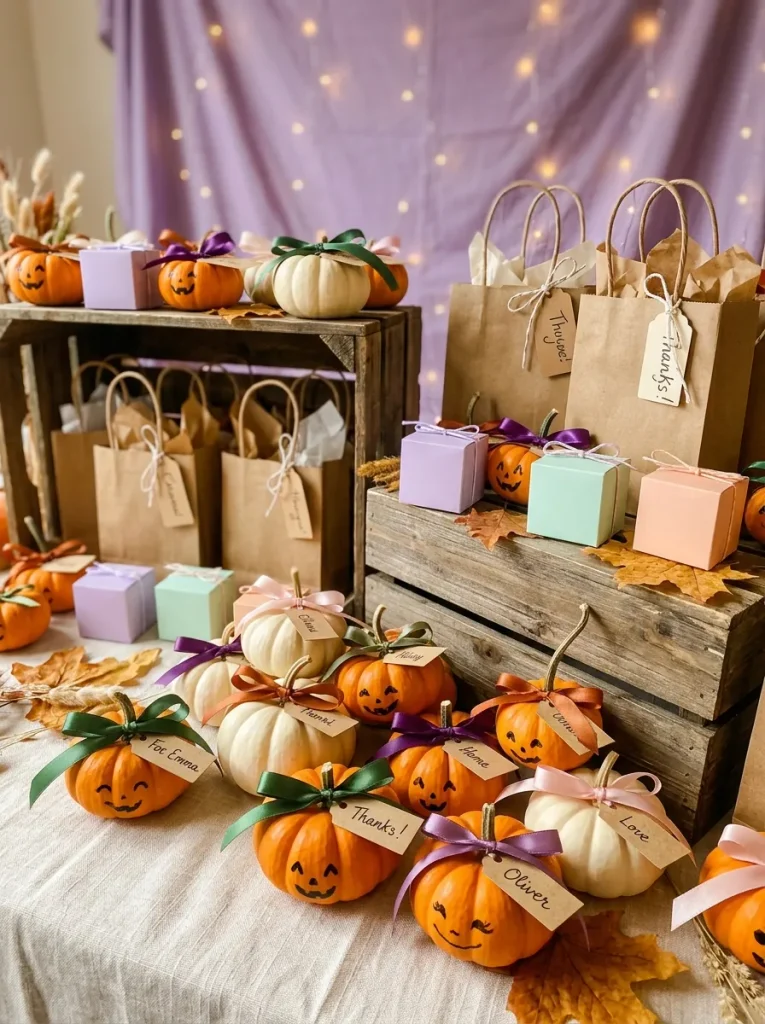
Mini pumpkin favors make Halloween gatherings feel extra thoughtful while giving guests something cheerful to take home. These little decorations work beautifully for family parties, classroom celebrations, and cozy autumn get-togethers.
- Choose miniature pumpkins: Select small, firm pumpkins in orange and cream shades that are easy for guests to carry.
- Decorate cheerful faces: Use washable markers or removable stickers to create smiling expressions without carving.
- Add colorful ribbons: Tie lavender, orange, or black satin ribbons around the stems for a festive finishing touch.
- Attach personalized tags: Write each guest’s name on a small kraft paper tag and secure it with cotton string.
- Create a favor station: Arrange the decorated pumpkins on wooden trays beside optional wrapped treats and paper bags.
Personalized pumpkin favors combine party decoration with a memorable takeaway, making them especially useful for hosts decorating on a budget. Arrange them near the exit so guests can collect theirs before leaving. Choose lightweight pumpkins and skip fragile embellishments if young children will receive the favors.
19. Cheerful Halloween Window Silhouettes
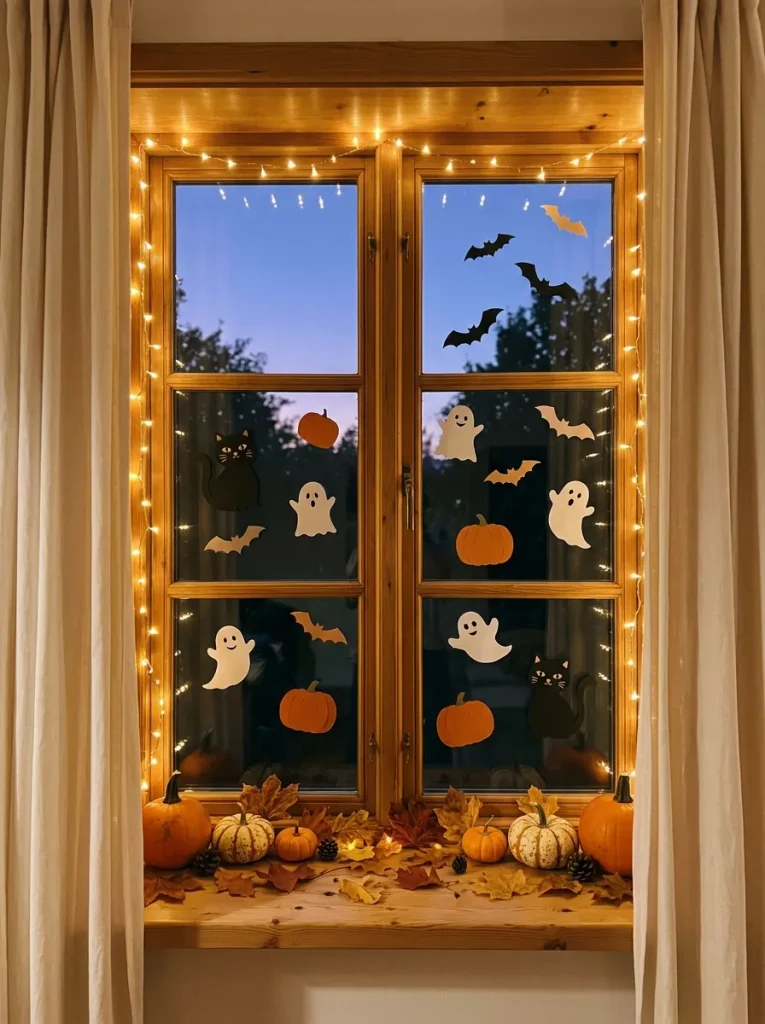
Quick Tip:
Create cheerful window silhouettes using black and orange cardstock with simple Halloween-shaped templates. Attach the cutouts with removable window-safe adhesive, keeping enough glass uncovered for natural light. Position warm LED fairy lights around the window frame to make the decorations visible during evening celebrations.
Window silhouettes turn ordinary glass panels into charming Halloween displays without requiring expensive supplies. Combine smiling ghosts, playful cats, and small pumpkins for a friendly atmosphere. Arrange larger shapes near the lower corners and smaller bats toward the top. The finished design looks festive from both inside and outside.
20. Witch Hat Chair Decorations
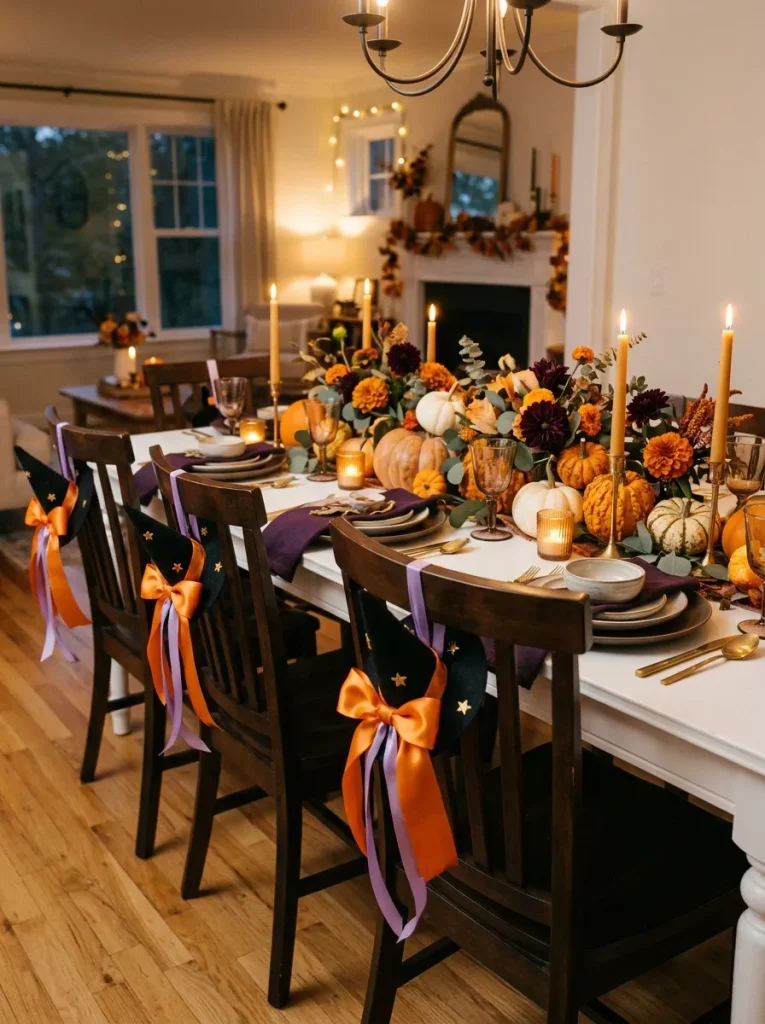
BEFORE:
Ordinary dining chairs can make an otherwise colorful Halloween party table feel unfinished. Even with festive plates and pumpkin centerpieces, the surrounding seating may lack the playful details that create a coordinated celebration.
AFTER:
Miniature witch hats decorated with orange bows and sparkling stars give each chair a charming Halloween personality. Coordinated ribbons connect the seating decorations with the table setting, creating a cheerful dining area that feels thoughtfully arranged and ready for guests.
Choose lightweight felt witch hats and attach them to chair backs using removable ribbon ties. Keep decorations clear of the seating area so guests remain comfortable. Match the bows to your table napkins or centerpiece colors. This simple detail adds extra personality to family dinners and Halloween parties.
21. Happy Pumpkin Staircase Garland
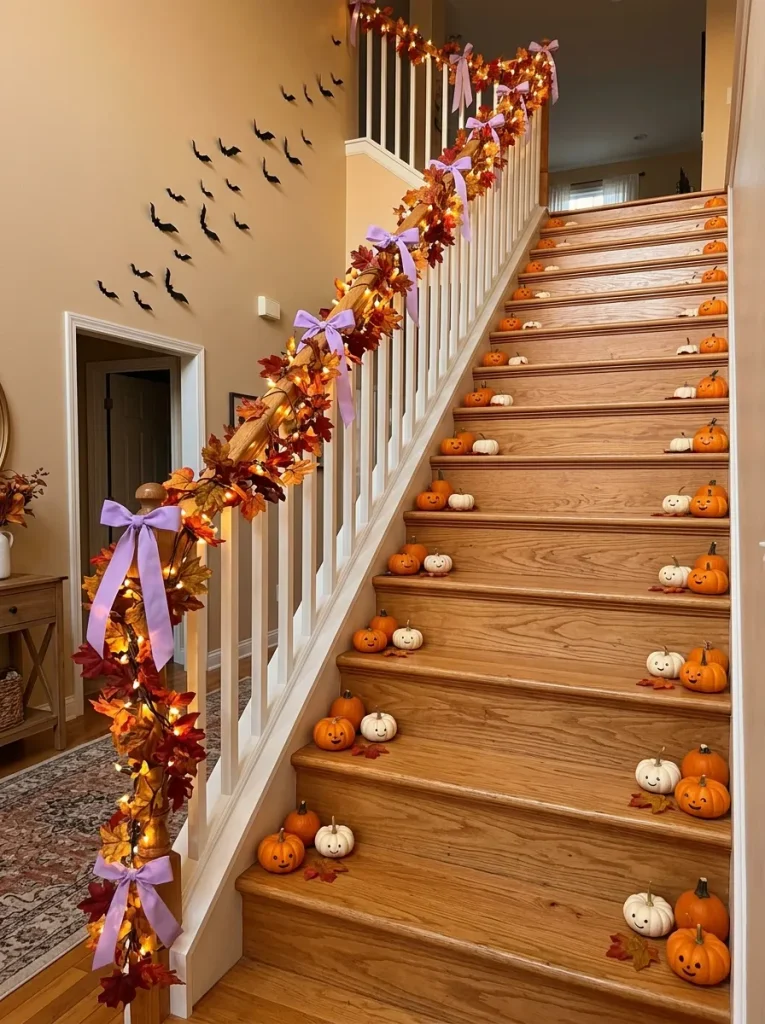
A cheerful pumpkin staircase garland brings seasonal color to an often-overlooked part of the home. Create a welcoming Halloween display with these easy decorating steps.
1. Choose a colorful garland: Select an artificial autumn leaf garland featuring orange, yellow, and muted green foliage.
2. Add miniature pumpkins: Attach lightweight foam pumpkins with smiling faces at intervals along the garland.
3. Include colorful ribbons: Tie lavender and orange ribbon bows between pumpkin clusters for playful contrast.
4. Incorporate gentle lighting: Weave battery-operated LED fairy lights through the arrangement, keeping wires secured and away from walking areas.
5. Secure the decoration: Fasten the garland to the outer railing with removable ties without obstructing the handrail.
Decorating the staircase helps connect different party areas with a consistent Halloween theme. Choose lightweight materials that stay firmly attached throughout the celebration. Keep every step clear and ensure guests can comfortably use the handrail. The combination of smiling pumpkins and autumn colors creates a welcoming seasonal accent.
22. Halloween Party Drink Station
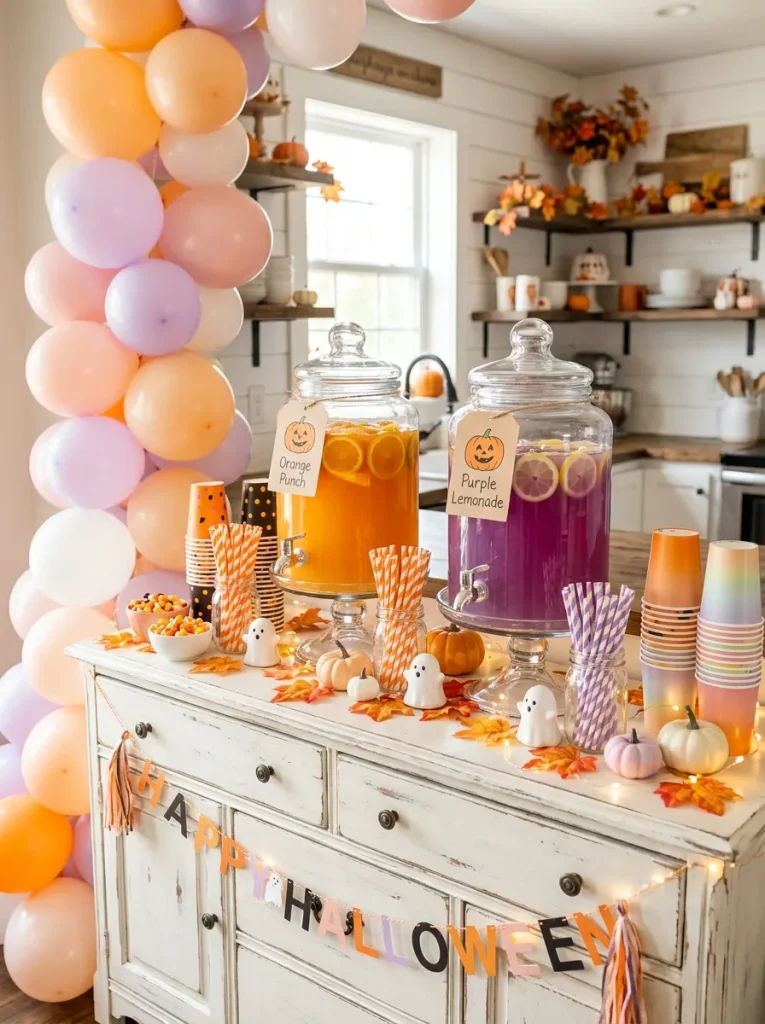
Cost: Approximately $20 to $45 using reusable dispensers and affordable party accessories.
Time: Around 30 to 45 minutes for decorating and arranging.
Skill Level: Beginner-friendly, requiring no special crafting experience.
Best For: Family Halloween parties, indoor celebrations, and festive buffet setups.
A colorful drink station makes refreshments easy to find while adding a cheerful focal point to your Halloween celebration. Arrange beverage dispensers on sturdy risers, label each drink clearly, and provide matching paper cups. Keep ice in a separate container and leave enough space for guests to serve themselves comfortably.
23. Smiling Pumpkin Welcome Display
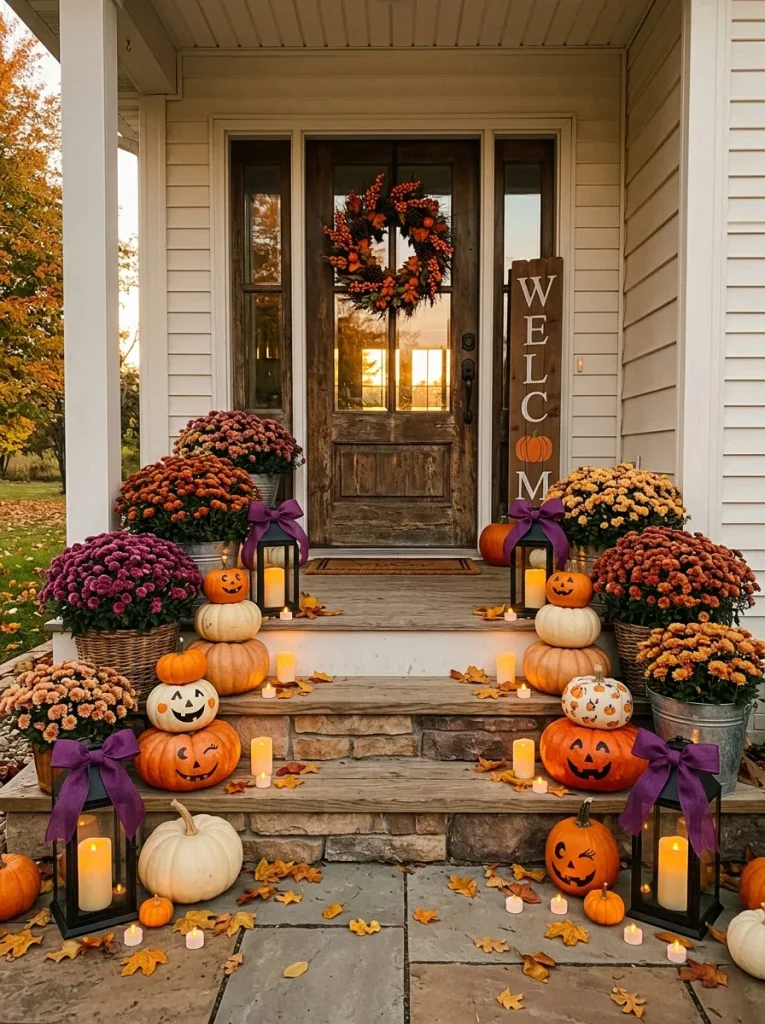
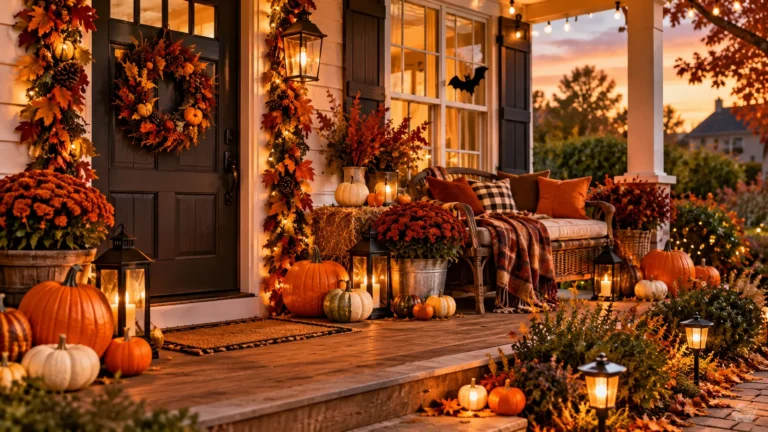
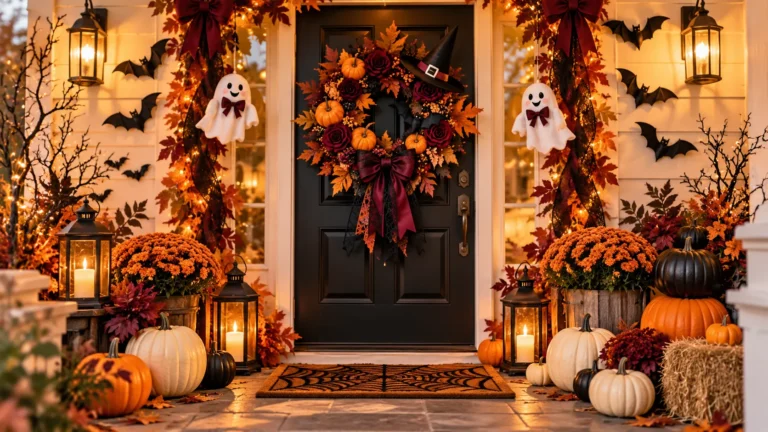
A cheerful pumpkin welcome display sets a festive mood the moment guests approach your home. Arrange three or five pumpkins in different sizes beside the front door, mixing traditional orange with creamy white varieties. Paint smiling faces using weather-resistant craft paint, then add potted chrysanthemums for a colorful autumn accent.
Place sturdy lanterns with battery-operated candles between the pumpkins to create a welcoming evening glow. Choose decorations that complement your front door and existing porch furniture. Keep the doorway, steps, and walking path completely clear. This joyful entrance is especially appealing for family-friendly Halloween parties and neighborhood celebrations.
Conclusion
Creating a memorable Halloween celebration is all about combining playful details, cheerful colors, and thoughtful decorating choices. These 23 Halloween party decorations offer plenty of inspiration for making your home feel festive without spending a fortune.
From smiling pumpkin centerpieces and floating ghosts to colorful balloon arches and glowing lanterns, even small decorative touches can make a celebration feel special.
Choose your favorite ideas, experiment with different arrangements, and enjoy creating a space that reflects your personal style.
Save this post on Pinterest for future inspiration, try a few decorations, and share these ideas with friends.
Make your Halloween party joyful, creative, and unforgettable!
One Comment